目次
はじめに
Unity とは、ユニティ・テクノロジーズが開発しているゲームエンジンです。
無料でインストール可能となっており、Unity を使って個人または複数人でゲームが開発できます。
Unity Hub は複数のバージョンの Unity Editor とそのプロジェクトをまとめて管理できるアプリケーションです。
本記事では Unity Hub を使った Unity のインストール方法を解説します。
この記事でのバージョン
Unity Hub 2.4.2
Unity Hub のダウンロード
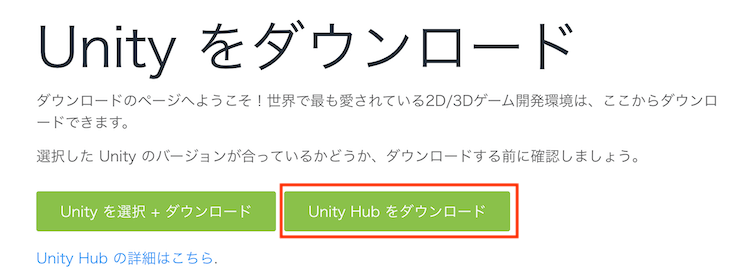
Unity 公式ページ にて「Unity Hub をダウンロード」を選択します。
![Unity Hub をダウンロード](http://www.midnightunity.net/wp-content/uploads/2021/02/unityhub-download.png)
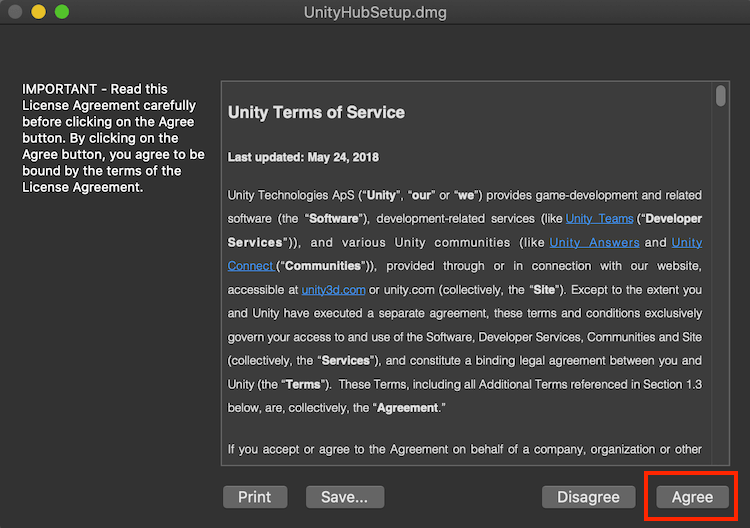
完了後にダウンロードした「UnityHubSetup.dmg」を開きます。
![UnityHubのdmgファイル](http://www.midnightunity.net/wp-content/uploads/2021/02/unityhub-downloaded.png)
サービス利用規約が開くので、内容に問題無ければ右下の「Agree」を選択します。
![Unity Hub の利用規約](http://www.midnightunity.net/wp-content/uploads/2021/02/unityhub-select-agree.png)
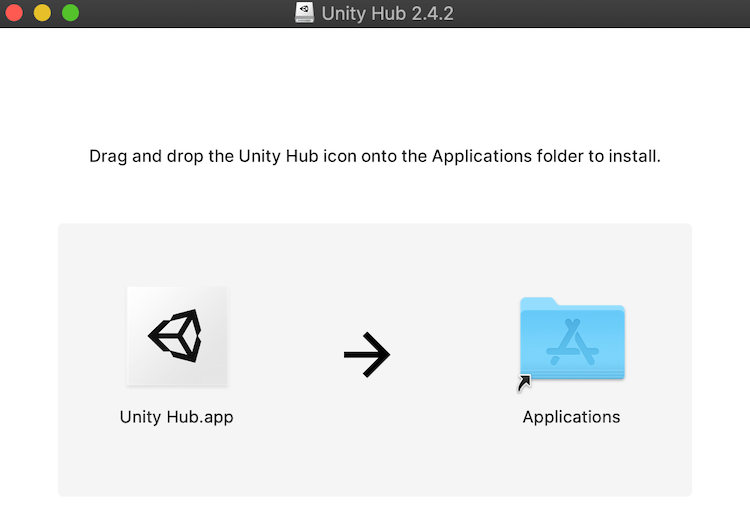
「Unity Hub.app」アイコンを「Applications」フォルダにドラッグアンドドロップします。
![Unity Hub を Applications にドラッグ&ドロップ](http://www.midnightunity.net/wp-content/uploads/2021/02/add-unityhub-to-application.png)
これで Unity Hub のダウンロードは完了です。
Unity ID の作成
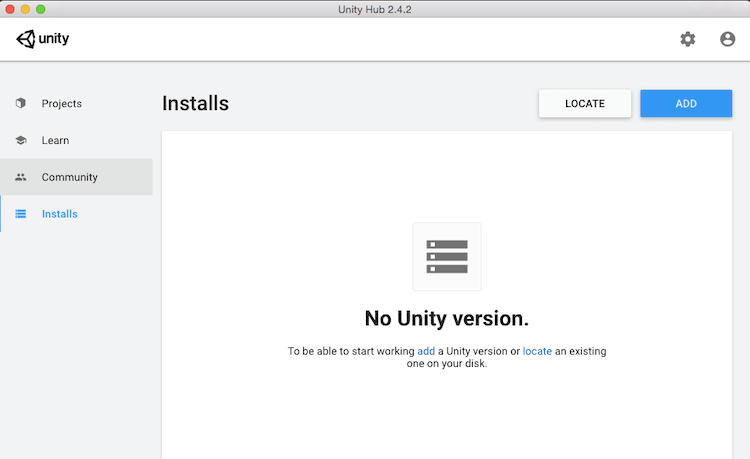
ダウンロードした Unity Hub を開くと以下のような画面が表示されます。
![Unity Hub の画面](http://www.midnightunity.net/wp-content/uploads/2021/02/unityhub-top.png)
言語設定が英語になっている場合は日本語に変更可能です。
右上の歯車ボタンを押し「Language」から変更できます。
![Unity Hub の言語変更](http://www.midnightunity.net/wp-content/uploads/2021/02/unityhub-general.png)
「English」を押して「日本語」に変更すると、Unity Hub 内での言語が日本語に変更されます。
![Unity Hub を日本語言語に変更](http://www.midnightunity.net/wp-content/uploads/2021/02/unityhub-change-language.png)
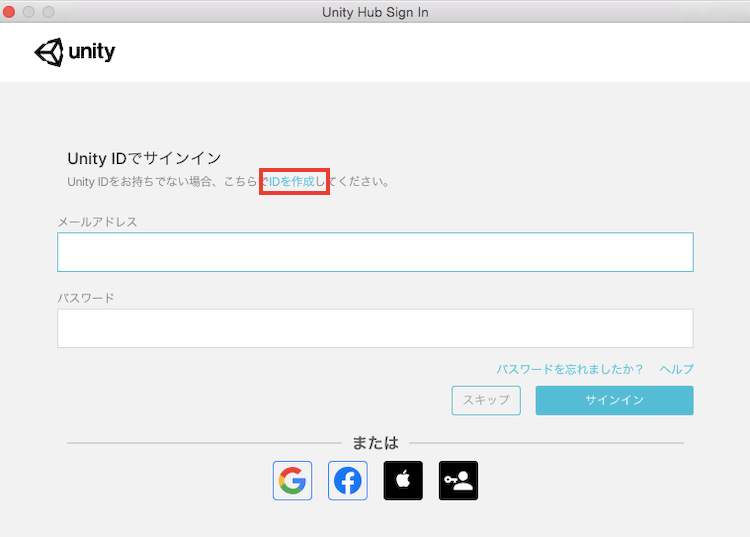
右上のプロフィールアイコンを押して「サインイン」を選択します。
![Unity Hub のサインイン](http://www.midnightunity.net/wp-content/uploads/2021/02/unityhub-sign-in.png)
「IDを作成」を選択します。
![Unity Hub で ID を作成](http://www.midnightunity.net/wp-content/uploads/2021/02/unityhub-create-id.png)
必要事項を入力し、チェックボックスにチェックを入れて「Unity ID を作成」を選択します。
![Unity Hub で ID に必要な項目を入力](http://www.midnightunity.net/wp-content/uploads/2021/02/unityhub-fill-inform.png)
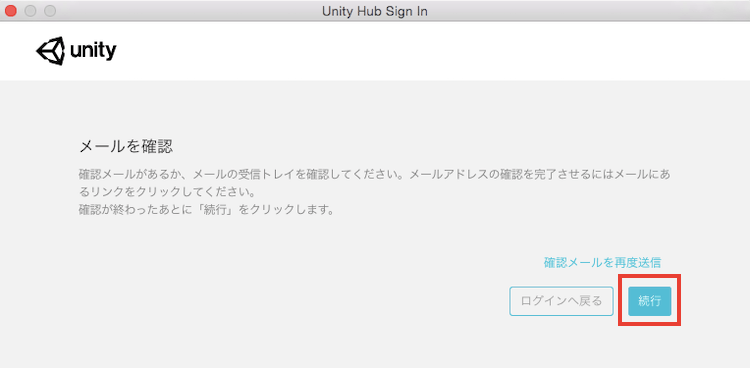
先程入力したメールアドレスにメールが届いているので、メール認証を済ませた後に「続行」ボタンを選択します。
![Unity Hub でメール確認後に続行](http://www.midnightunity.net/wp-content/uploads/2021/02/unityhub-continue.png)
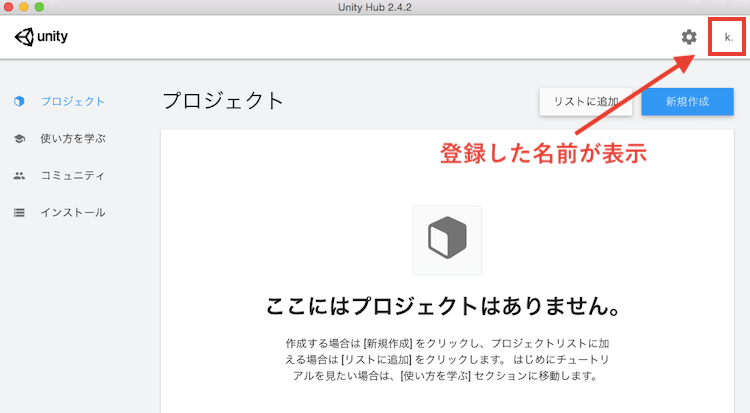
Unity Hub の右上に登録した名前が表示されていれば Unity ID の作成は完了です。
![Unity Hub でログイン完了](http://www.midnightunity.net/wp-content/uploads/2021/02/unityhub-logged-in.png)
ライセンス認証の設定
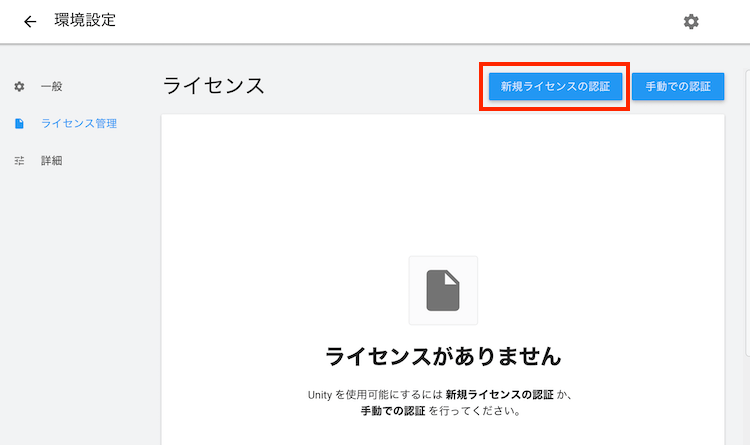
ライセンスが無い場合は新規ライセンスの認証を行います。
右上の歯車ボタンから環境設定を開き、左側の「ライセンス管理」を選択します。「ライセンスがありません」と表示されたら画面上部「新規ライセンスの認証」を選択します。
![Unity Hub の新規ライセンス認証](http://www.midnightunity.net/wp-content/uploads/2021/02/unityhub-no-license.png)
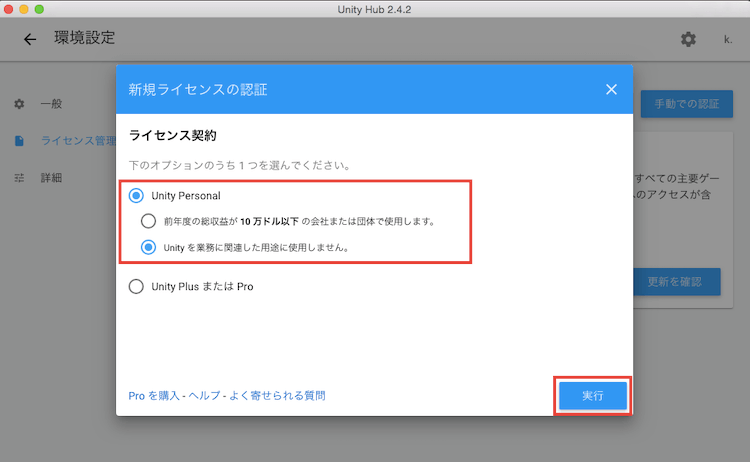
プライベートで無料で使う場合は「Unity Personal」と「Unity を業務に関連した用途に使用しません。」を選び「実行」を選択します。
![Unity Hub のライセンス認証](http://www.midnightunity.net/wp-content/uploads/2021/02/unityhub-license-authentication.png)
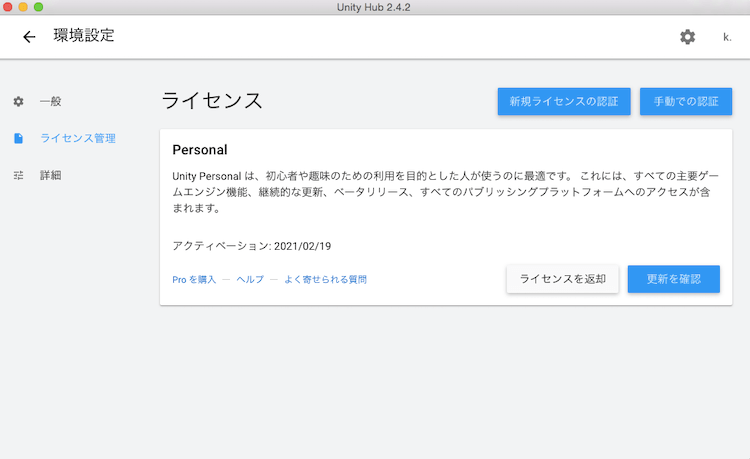
ライセンスの認証が完了すれば以下のような画面になります。
![Unity Hub のライセンス管理](http://www.midnightunity.net/wp-content/uploads/2021/02/unityhub-license.png)
Unity のインストール
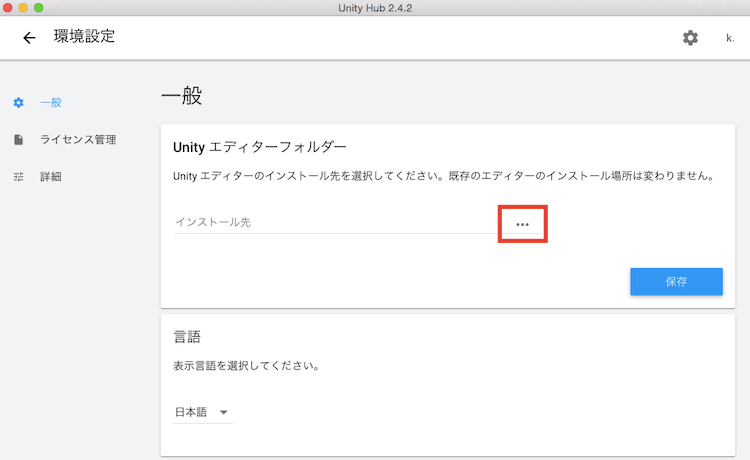
インストール前に Unity のインストール先を設定をします。
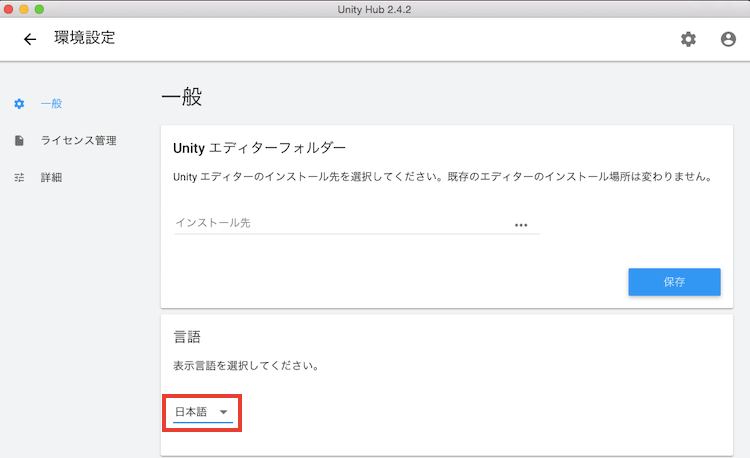
画面右上の歯車ボタンから環境設定を開き、左側の「一般」を選択します。「・・・」からインストール先を選んで保存します。
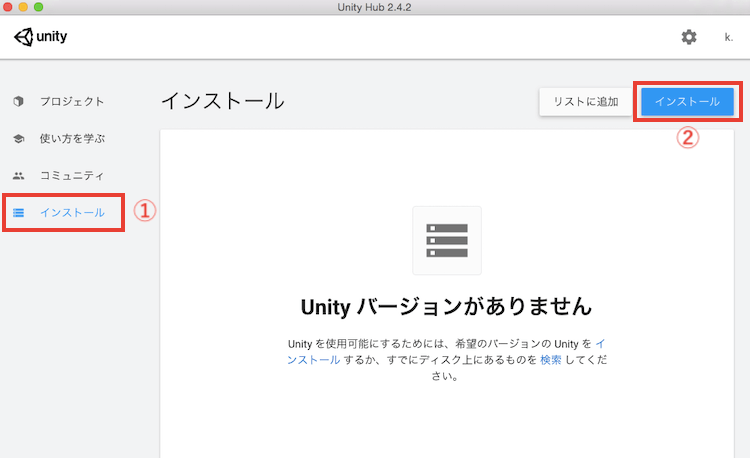
![Unity エディターフォルダーの選択](http://www.midnightunity.net/wp-content/uploads/2021/02/unityhub-select-folder.png)
Unity のインストールを行います。
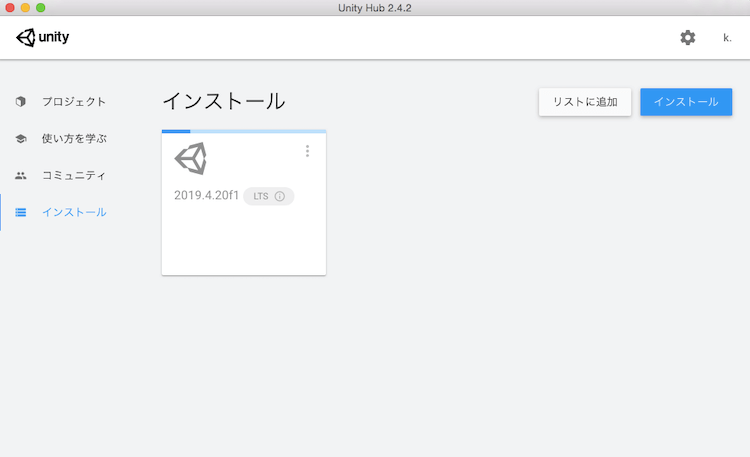
Unity Hub のトップ画面から左側「インストール」を選び、右上の「インストール」ボタンを選択します。
![Unity Editorのインストール手順](http://www.midnightunity.net/wp-content/uploads/2021/02/unityhub-install-editor.png)
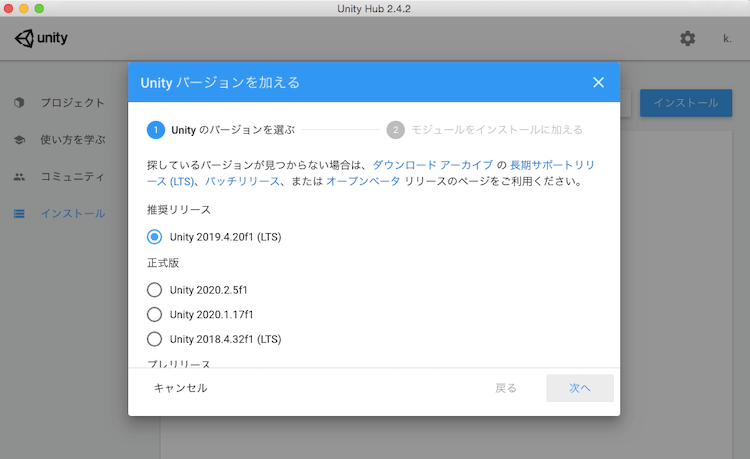
インストールする Unity のバーションを選びます。
特に指定のバージョンが無ければ、推奨リリースである長期サポート(LTS)バージョンを選んで「次へ」を選択します。
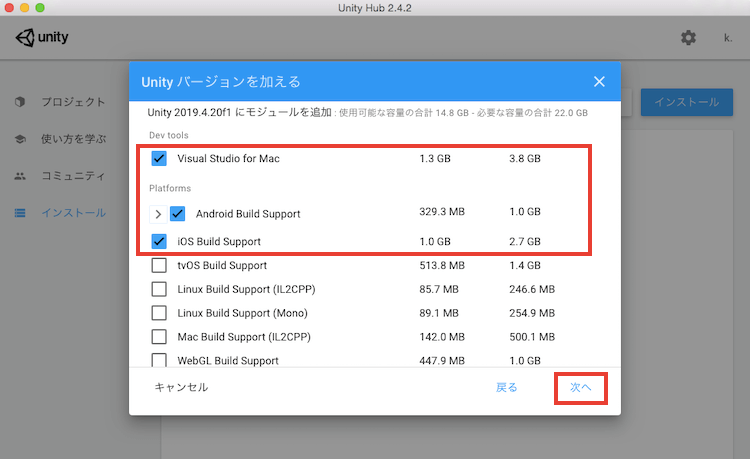
![Unity Hub の Unity バージョン選択](http://www.midnightunity.net/wp-content/uploads/2021/02/unityhub-select-editor-version.png)
追加するモジュールを選択します。
「Visual Studio for Mac」はスクリプト用のツールです。デフォルトで選択されているかと思います。
「〇〇 Build Support」は作成したゲームを各プラットフォームでビルドする際に必要なモジュールです。必要に応じで追加しましょう。(後からでも追加可能です。)
選び終わったら「次へ」を選択します。
![Unity Hub のモジュール追加](http://www.midnightunity.net/wp-content/uploads/2021/02/unityhub-select-module.png)
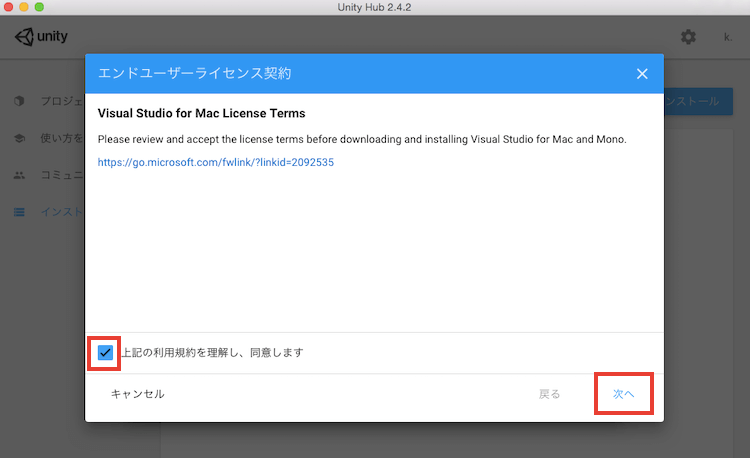
追加するモジュールに関してエンドユーザーライセンス契約画面が表示されます。利用規則に同意した場合はチェックボックスにチェックを入れて「次へ」を選択します。
![Unity Hub の Visual Studio ライセンス契約](http://www.midnightunity.net/wp-content/uploads/2021/02/unityhub-confirm-mac-license.png)
Unity のインストールが開始します。
![Unity Editor をインストール中](http://www.midnightunity.net/wp-content/uploads/2021/02/unityhub-editor-installing.png)
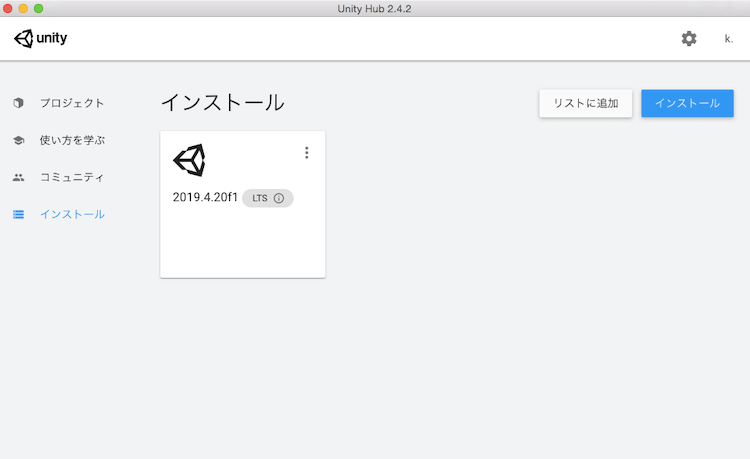
ロード中表示が無くなればインストール完了です。
![Unity Editor のインストール完了](http://www.midnightunity.net/wp-content/uploads/2021/02/unityhub-editor-installed.png)
Unity でプロジェクトを作成してみる
インストール完了した Unity を開いてみます。
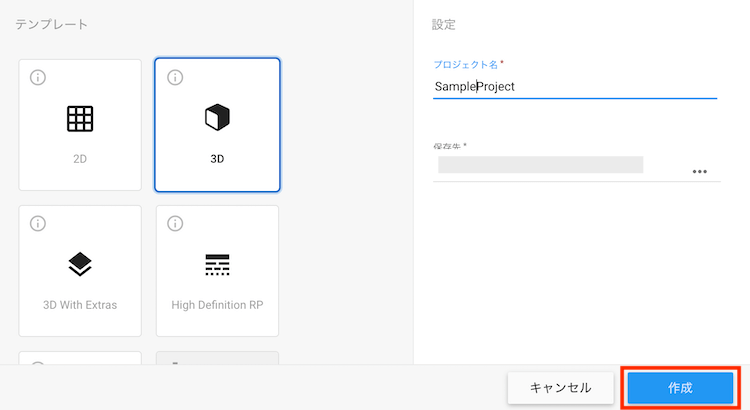
Unity Hub のトップ画面から、左側の「プロジェクト」を選び、右上の「新規作成」を選択します。
![Unity Hub からプロジェクトを新規作成](http://www.midnightunity.net/wp-content/uploads/2021/02/スクリーンショット-2021-02-20-21.19.17.png)
プロジェクト名を入力して「作成」を選択します。
![Unity Hub から3Dプロジェクトを作成](http://www.midnightunity.net/wp-content/uploads/2021/02/unityhub-create-3d-project.png)
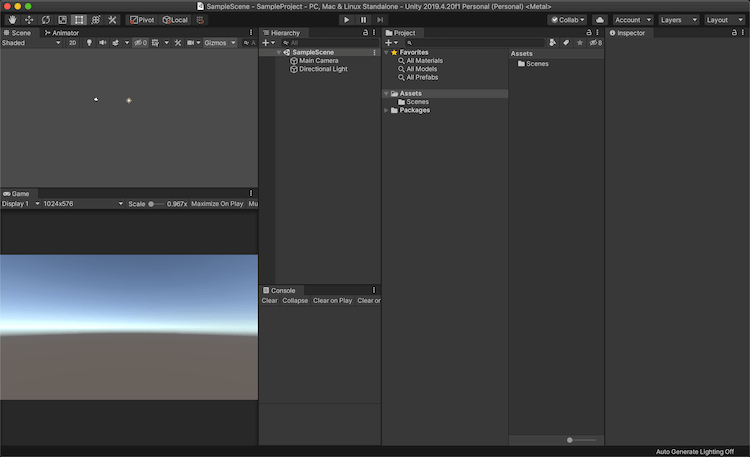
プロジェクトが作成され、Unity が立ち上がりました。
![Unity Editor の画面](http://www.midnightunity.net/wp-content/uploads/2021/02/unity-editor-top.png)
終わりに
Unity でゲームを開発する準備が整いました。
Unity を使って自分の作りたいゲームを自由に作ってみましょう。